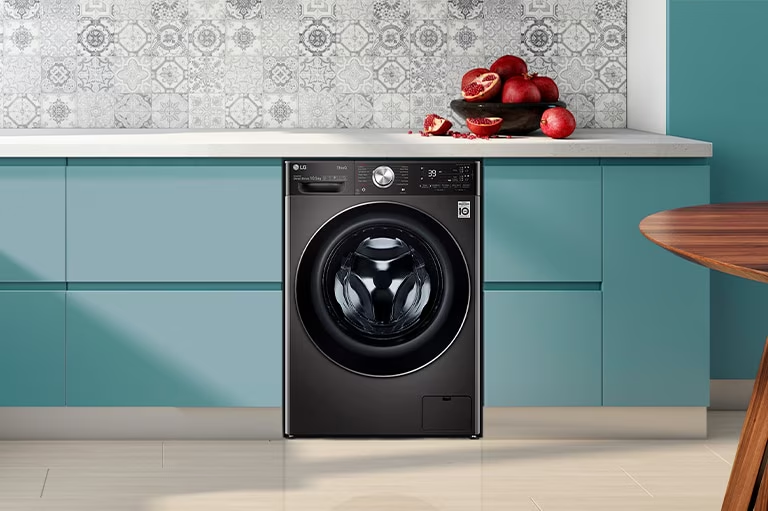
Learning how to level a washing machine is a straightforward DIY fix that resolves common issues like violent shaking, rattling, and a “walking” washer during the spin cycle. An unbalanced washing machine can cause significant damage to internal components, lead to poor cleaning performance, and even result in water damage or floor scratches. This adjustment typically takes 15-20 minutes and requires only a carpenter’s level and an adjustable wrench or pliers.
Why Does a Level Washing Machine Even Matter?
An unlevel washer isn’t just noisy; it’s inefficient and prone to early breakdown. The “little shaking” is a symptom of a bigger problem that can cause a domino effect of issues.
- Damage to Internal Components: When off-balance, the drum slams against the frame, stressing shocks, springs, and bearings. This is the primary cause of premature wear and tear in modern washers.
- Poor Cleaning Performance: An unlevel machine cannot distribute the laundry load evenly, causing water and detergent to pool. This results in clothes that are not properly cleaned or rinsed.
- Water Damage and Inefficiency: Violent motion can loosen water hoses, leading to leaks. Sensors may struggle to balance the load, increasing water and energy consumption by repeating rinse and spin cycles.
- Damage to Your Home: Constant vibration can scratch flooring and transfer noise through floor joists to other parts of your house.
Simply put, a level washer is a happy, healthy, and quiet washer.
Getting Started: The Tools You’ll Need
You don’t need a professional’s toolbox for this job; most items are likely already on hand. Gather these items before you begin:
- A Carpenter’s Level: A 2-foot level is ideal, but a smaller torpedo level works. Many smartphone apps offer a surprisingly good alternative.
- Adjustable Wrench or Pliers: Essential for loosening and tightening the lock nuts on the machine’s feet. Channel-lock pliers are highly effective.
- A Helper (Optional but Recommended): A second person makes tilting the heavy machine safer and faster, though it can be done alone.
The Step-by-Step Guide to a Perfectly Level Washer
This process should take no more than 15-20 minutes. We’re going to make that machine stand as still and solid as a statue.
- Safety First: Unplug the Machine. Always disconnect the power source before tilting or moving the machine to prevent potential accidents.
- The Wobble Test. Place your hands on the top corners of the washer and try to rock it diagonally (front-right to back-left, then vice-versa). If it wobbles, you’ve identified the issue and which foot (or feet) is not making proper contact.
- Place Your Level on Top. Lay the carpenter’s level on the top of the washing machine, first front-to-back, then left-to-right. Check the bubble each time to determine the machine’s lean.
- Adjust the Leveling Feet. Most washing machines have four adjustable feet, one at each corner. You’ll need to tilt the machine slightly to access them.
- Have your helper lean the washer back against the wall to easily reach the front two feet. If working alone, securely prop it up with a block of wood.
- Each foot has a threaded leg and a lock nut. Loosen the lock nut first by turning it counter-clockwise with your wrench.
- Once loose, turn the foot itself. Clockwise (righty-tighty) raises the corner; counter-clockwise (lefty-loosey) lowers it.
- Make small adjustments based on your wobble test and level readings. For example, if the front-left corner was high, lower that foot.
- Lower and Re-Check. Gently set the machine back down. Place the level on top again and perform another wobble test. Repeat step 4 until the machine is perfectly level front-to-back and side-to-side, with no rocking.
- Crucial Final Step: Tighten the Lock Nuts! This is vital to prevent vibrations from undoing your work. Once the feet are adjusted, tighten the lock nut against the machine’s base using your wrench until snug.
- Run a Test Cycle. Plug the machine back in and run a small test load or a spin and drain cycle. Observe for a dramatic reduction in noise and vibration.
Pro Tips and Troubleshooting for Tricky Situations
Sometimes, the floor itself is the problem, or different machine types have their own quirks. Here’s how to handle a few common curveballs.
What if My Laundry Room Floor is Uneven?
Bảng trống.This is common, especially in basements or older homes. If the floor has a significant slope, extending one leveling foot almost all the way out can work but may reduce stability.
A better solution for a very sloped floor is to place a piece of 3/4-inch plywood underneath the machine. Level the plywood first using shims, creating a solid, flat base for your washer.
Are Top-Load and Front-Load Washers Leveled Differently?
The basic principle of how to level a washing machine is the same for both types, but there’s a small difference. While all four feet are typically adjustable on front-loaders, many top-load models have self-adjusting rear legs. For these, level the machine front-to-back by adjusting the front feet; the rear legs will adjust automatically as you gently lower the machine.
Should I Use Anti-Vibration Pads?
Anti-vibration pads are thick rubber squares placed under your washer’s feet. They are excellent for two reasons:
- They absorb minor, residual vibrations, contributing to quieter operation.
- They protect your floor from scratches and help prevent the machine from “walking,” especially on slick surfaces like tile or vinyl.
They are a great addition after you’ve properly leveled the machine, but they are not a substitute for proper leveling.
A Word From an Expert“As a certified appliance technician, the number one service call I get for ‘noisy washers’ is an unlevel machine,” says John Carter. “People do a great job adjusting the feet, but they almost always forget to tighten the lock nuts. The machine works quietly for a week, and then the vibrations loosen the feet right back to where they were. Tightening those nuts is the key to a long-lasting fix.”
Frequently Asked Questions
How can I tell if my washing machine is level without a tool?
A simple trick is to place a glass of water on the top center of the machine. If the water line is parallel with the top edge of the glass on all sides, you’re very close to level. However, a dedicated level is far more accurate for a perfect result.
How often should I check if my washing machine is level?
It’s a good practice to check it once a year as part of your regular appliance maintenance routine. You should also check it any time you move the machine for cleaning or if you start to notice an increase in noise or vibration.
Can an unbalanced load of laundry make a level machine shake?
Absolutely. Leveling the machine provides a stable foundation, but it can’t fix a poorly distributed load. A single, heavy, water-logged item like a bath mat, a pair of jeans, or a blanket can throw the drum off-balance during the spin cycle. Always try to wash a mix of large and small items.
What are the plastic things on the back of a new washing machine?
Those are shipping bolts or transit bolts. They are crucially important to keep the drum stable during transport but must be removed before you use the machine for the first time. Leaving them in will cause violent, damaging shaking that is far worse than an unlevel machine.
Is it hard to level a washing machine by myself?
It’s not hard, but it can be physically awkward. The main challenge is tilting the heavy machine to access the feet. If you are strong enough to safely tilt it and prop it up, you can do it alone. However, having a helper makes it significantly easier and safer.
Your Ticket to a Quieter Laundry Day
You are now fully equipped with the knowledge of how to level a washing machine like a professional. It’s a small investment of time that pays huge dividends in the form of a longer-lasting appliance, cleaner clothes, and a much more peaceful home. So next time you hear that familiar thump-thump-thump, don’t just sigh and close the laundry room door. Grab your level and wrench, and take control. Your washer (and your ears) will thank you.
Frequently Asked Questions
How can I tell if my washing machine is level without a tool?
You can perform a quick check by placing a glass of water on the top center of the machine. If the water line appears parallel with the top edge of the glass on all sides, the machine is close to level. However, for precise leveling, a dedicated carpenter's level is significantly more accurate.
How often should I check if my washing machine is level?
It is recommended to check your washing machine's level once a year as part of your regular appliance maintenance routine. You should also re-check it any time the machine is moved for cleaning or if you notice an increase in noise or vibration during operation.
Can an unbalanced load of laundry make a level machine shake?
Yes, absolutely. Even a perfectly level machine can shake violently if the laundry load is poorly distributed. Heavy, water-logged items like bath mats or blankets can throw the drum off-balance during the spin cycle. Always try to wash a mix of large and small items to help balance the load.
What are the plastic things on the back of a new washing machine?
Those are shipping bolts, also known as transit bolts. They are crucial for stabilizing the drum during transport to prevent damage. However, they must be removed before the first use of the machine; leaving them in will cause severe, damaging shaking far worse than an unlevel machine.
Is it hard to level a washing machine by myself?
Leveling a washing machine alone is not inherently difficult, but it can be physically awkward due to the machine's weight. The main challenge is safely tilting the heavy appliance to access the leveling feet. If you are strong enough to tilt and prop it securely, you can do it alone, but having a helper makes the process significantly easier and safer.
Level a Washing Machine
This guide provides a step-by-step process to level your washing machine, eliminating shaking and noise, and protecting your appliance from damage. The process typically takes 15-20 minutes.
Always disconnect the power source before attempting any adjustments or moving the washing machine. This simple safety step prevents potential electrical accidents.
Place your hands on the top corners of the washer and try to rock it diagonally. Push from the front-right to the back-left, then vice-versa. If it wobbles, you've identified the problem and which foot (or feet) needs adjustment.
Lay a carpenter's level on the top of the washing machine, first running front-to-back, then left-to-right. Check the bubble each time to determine the direction the machine is leaning and which feet need adjustment.
Tilt the machine slightly to access the four adjustable feet at each corner. Loosen the lock nut on each foot by turning it counter-clockwise with a wrench. Then, turn the foot clockwise to raise the corner or counter-clockwise to lower it, making small adjustments based on your level readings.
Once the machine is perfectly level and stable, tighten all lock nuts back against the machine's base to secure the feet. Plug the machine back in and run a small test load or a spin cycle to confirm a dramatic reduction in noise and vibration.
Get our weekly buyer guide
Practical specs, not advice. Unsubscribe anytime.
My old washer was making such a racket, especially during the rinse cycle, and I was worried about it damaging the floor. I followed the advice about checking the feet and using a carpenter’s level. It definitely helped reduce the rattling a lot. I wish I’d known how simple this fix was years ago, could have saved some wear and tear.
I tried to level my washing machine because it was shaking violently, but I had a bit of trouble getting the back feet adjusted properly. The instructions were good, but my wrench wasn’t quite the right size for the lock nuts on my specific model. It’s better now, but still has a slight wobble sometimes. Maybe I need a different type of wrench.
This was a lifesaver! My clothes weren’t getting as clean as they used to, and I suspected it was related to the machine being off-balance. After following the steps to adjust the shocks and springs, the drum isn’t slamming around anymore. My laundry actually feels cleaner now, and the machine is much quieter. Highly recommend checking your washer’s level.
I was so frustrated with my washing machine walking across the laundry room during the spin cycle. I thought I’d have to call a repairman, but decided to check online first. The steps here for leveling it with just a wrench and a level were super clear. It took me about 20 minutes, and now my washer is perfectly still. Huge relief!